

Photo: lumoplank, Wikimedia Commons (CC0) — Frost-rimmed Japanese maple leaves at Lake Kawaguchi (November 2025)

Frozen Trails in Late Autumn: Walking on Frost & Ice, and Choosing Between Chain Spikes, Light Crampons, and 10-Point Crampons
Even when autumn foliage is still bright in late October and November, clear mornings bring frost and thin ice to high-elevation and shaded trails in Japan. Using Japan Meteorological Agency data, prefectural police autumn mountain advisories, and Montbell's official chain-spike manual, this guide explains where ice forms, how to walk on frozen ground, and when to turn back.
Information checked October 24, 2026. Meteorological data, accident statistics, and traction-device precautions in this article are verified against official publications from the Japan Meteorological Agency (JMA), Nagano Local Meteorological Office, Nagano Prefectural Police, Toyama Prefectural Police, the National Police Agency, the U.S. National Park Service, and Montbell's official instruction manual.
Assume Something on the Trail Is Frozen on Late-Autumn Mornings
From mid-October through November in Japan's mountains, clear, calm mornings regularly leave frost and thin ice on higher-elevation ridges and shaded trails—even on mountains where autumn foliage photos still look warm and bright.
Keep four principles in mind:
- Know when and where ice forms: Early morning, north-facing slopes, shaded forest sections, wooden boardwalks, and flat rock slabs.
- Adjust your stride on frozen ground: Take short steps, place your entire sole flat on the ground, and use trekking poles to add points of support.
- Carry traction devices in your pack: For frost or thin ice on non-technical trails in late autumn, chain spikes (microspikes) are a practical backup; once snow accumulates or steep slopes freeze solid, treat the mountain as a winter climb requiring full 10-point (or 12-point) crampons and winter boots.
- Turn back if your traction isn't enough: Especially anywhere a slip leads toward a cliff, steep gully, or stream gorge.
Why Do Mountain Trails Freeze Even in October?
1. Morning Temperatures Drop Sharply with Elevation
According to the Japan Meteorological Agency's forecast terminology, air temperature typically drops by 0.5 to 1.0 °C for every 100 m of elevation gain (temperature lapse rate). Even when a valley town forecast shows a morning low of 10 °C, a trail 1,000 m higher will be roughly 5 to 10 °C colder.
JMA's 30-year climate normals (1991–2020 average daily minimum temperatures) illustrate this clearly:
| Weather Station | Elevation | October Mean Daily Min. | November Mean Daily Min. |
|---|---|---|---|
| Nagano City | ~418 m | 10.3 °C | 3.4 °C |
| Karuizawa | ~999 m | 6.3 °C | −0.2 °C |
| Mt. Fuji Summit | ~3,775 m | −5.1 °C | −11.8 °C |
Because these are full-month averages, late October and late November are colder still. Starting from Karuizawa's October average (6.3 °C at ~1,000 m) and subtracting ~0.6 °C per 100 m puts 2,000 m peaks right around 0 °C on an October morning. Many of Japan's most popular autumn-foliage mountains sit between 1,500 m and 2,500 m.
Toyama Prefectural Police's Autumn Mountain Advisory likewise warns that high peaks in Toyama can see snowfall at any time from October onward, and even without snow, morning and evening temperatures at Murodo-daira (~2,450 m) frequently drop below 10 °C.
2. Clear, Calm Nights Cool the Ground Below Air Temperature
According to the Nagano Local Meteorological Office's explanation of frost and radiative cooling, on clear, calm nights under a migratory high-pressure system, heat radiates rapidly from the ground into the sky (radiative cooling). Because the ground surface cools below the official air temperature (measured 1.5 m above the ground), frost frequently forms whenever the air temperature drops to 3 °C or lower, particularly in basins and valley bottoms where cold air pools.
In other words, even if a mountain forecast shows a morning air temperature around 3 °C, wooden boardwalks, rocks, and soil surfaces can already be frozen.
3. Slips and Falls Account for Over Half of Autumn Mountain Accidents
According to Nagano Prefectural Police's 2026 Autumn Mountain Advisory (r8akiyama.pdf), out of 83 autumn mountain accidents in Nagano between September and November 2025:
- Falls down slopes (ten-katsuraku): 22 cases
- Same-level slips and stumbles (tento): 21 cases
Together, slips and falls accounted for more than half of all autumn accidents, triggered by stepping on loose stones, catching a boot on tree roots, or slipping on wet or icy rock. Nationwide figures from Japan's National Police Agency (2025 Overview of Mountain Accidents, 3,623 total victims) show the same pattern: after getting lost (30.9%), stumbles/slips (19.2%) and falls down slopes (17.3%) are the leading causes of mountain accidents.
Where and When Trails Freeze
Times of Day: Around Sunrise and Late-Afternoon Shade
The ground is coldest from just before dawn until shortly after sunrise, after radiative cooling has continued all night. In late autumn, the sun stays low in the sky, leaving north-facing and forested trail sections in shadow all day. By mid-afternoon, wet rocks and puddles in shaded sections begin refreezing—meaning a trail that was icy on your morning ascent may still be icy on your afternoon descent. See our guide to Planning for Early Sunset in Late Autumn for turnaround-time planning.
Terrain: North-Facing Slopes, Forest Shade, and Stream Valleys
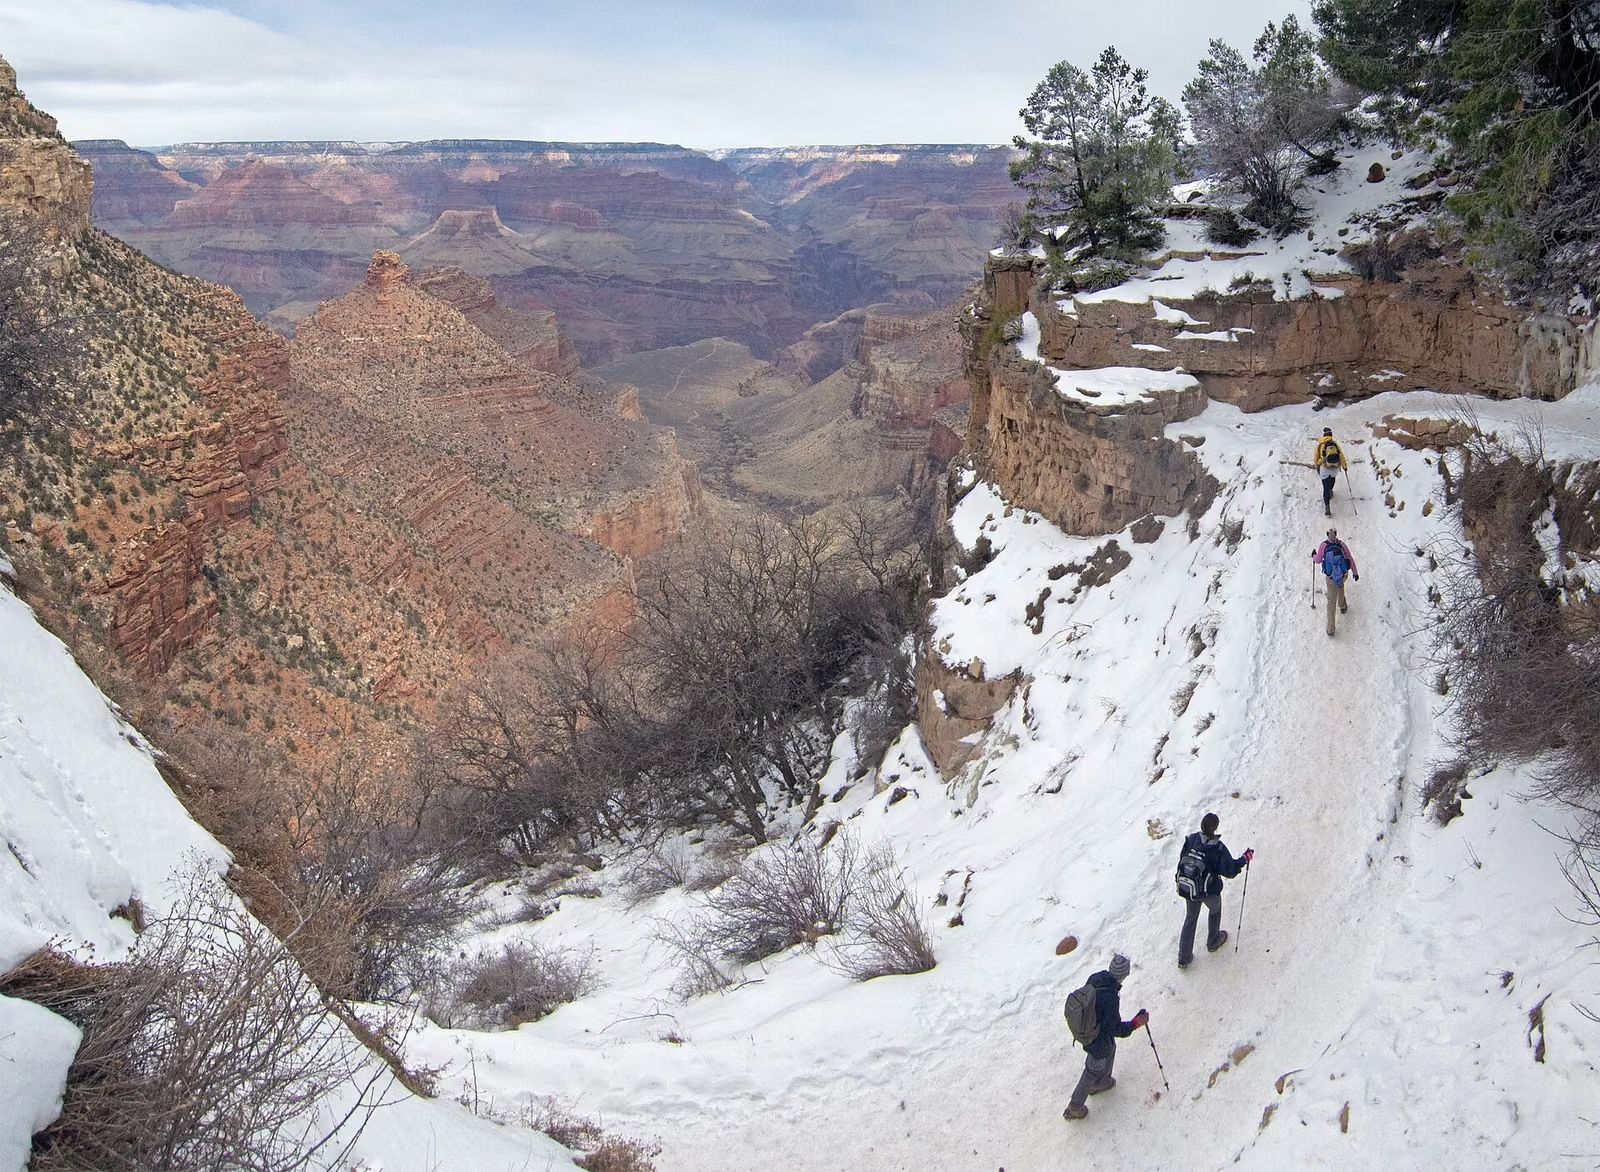
North-facing slopes receive little direct sunlight, allowing frost and ice to linger LONG after south-facing trails have dried. As the U.S. National Park Service notes in its Grand Canyon winter hiking guidance, predominantly north-facing trails retain packed snow and ice continuously, whereas sunlit trails alternate between dry dirt and icy patches.

Surfaces: Boardwalks, Tree Roots, Flat Rocks, and Seepage
- Wooden boardwalks and timber stairs: Even a thin white film of hoarfrost turns wood extremely slick.
- Tree roots and flat rock slabs: Already slippery when wet, they offer almost no friction once glazed with frost.
- Water seeps and stream crossings: Water trickling across rock freezes into clear "black ice" that looks merely wet.
- Fallen leaves: Dead leaves often conceal frozen mud or ice underneath.
Midday Hazard: Mud from Melting Needle Ice (Shimobashira)
On clear mornings, moisture in bare soil freezes into vertical ice columns (needle ice, or shimobashira). Once sunlight warms the trail around midday, those ice columns melt and turn the soil into slick mud—so the same trail can be icy in the morning and muddy by noon.


How to Walk on Frozen Trails
- Shorten your stride: Shorter steps keep your center of gravity directly over your planted foot.
- Place your entire sole flat on the ground: Striking hard with your heel or pushing off aggressively with your toes invites a slip.
- Step on textured surfaces rather than smooth ones: Choose exposed soil or gravel over smooth rock slabs, and Frost-free edges on boardwalks.
- Descending requires extra care: Leaning backward causes your heel to shoot out in front of you. Bend your knees slightly, lower your hips, and keep your weight centered over your feet. For technique that also protects your knees on long descents, see Why Your Knees Hurt on the Descent.
- Use trekking poles for balance: Two poles add points of contact to catch a slip, though steel tips can still skate on solid ice—never lean all your weight onto a pole tip on icy rock.
Chain Spikes vs. Light Crampons vs. 10-Point+ Crampons
1. Chain Spikes (Microspikes): Backup Traction for Gently Graded Frozen Trails
Chain spikes wrap a flexible elastomer band around your boot with short stainless-steel spikes linked by chains underfoot. According to Montbell's official Chain Spike Instruction Manual (#1129740), chain spikes are:
- Designed for winter low-mountain walks and summer snowfield crossings
- Easy to pull over boots like a sock, flexing with the sole to fit everything from soft-soled trail shoes to stiffer trekking boots
- Explicitly marked as simplified traction: "This product is a simplified crampon. Do not use it for full-scale snowy mountain climbing."


2. Light Crampons (4 to 6 Points) and 10-Point+ Crampons
- Light crampons (4–6 points): Strap under the arch/midfoot with longer spikes than chain spikes, useful on gentle compacted snow, but lack front points and heel spikes.
- 10-point or 12-point crampons: Required whenever trails enter genuine winter mountain conditions with steep frozen slopes or snow accumulation, where a slip could result in a dangerous slide.


3 Precautions from Montbell's Official Manual Before Using Chain Spikes
Montbell's instruction manual highlights three critical safety warnings:
- Match the exact size to your boots: Using the wrong size reduces performance, and a loose elastomer band can snag on tree roots or branches and trip you. Try them on your actual hiking boots at home before your trip.
- Inspect before every use and clear snow buildup: Check chains, spikes, and bands for cracks, deformation, or wear before each hike, and continually knock away snow clumps (yukidango) packed under the spikes—packed snow prevents the spikes from biting into the ice.
- Practice walking first: Wearing spikes increases the chance of catching a spike on rocks, roots, or pant cuffs and tripping. Walk on ice/snow only; walking long distances on bare rock bends spikes and damages the rubber bands.
When to Put Spikes On—and When to Turn Back
- Put traction on BEFORE stepping onto the ice: Trying to balance on one foot after you are already on an icy slope is dangerous. Stop on flat, safe ground as soon as you see frost ahead.
- Turn back immediately if:
- Frozen sections continue and you do not have traction devices (especially if you will have to descend the same slope later)
- Your feet still slip even with chain spikes on
- Slow progress on ice pushes you past your planned turnaround time
- The frozen trail traverses above a cliff, steep drop-off, or gorge
- Snow appears on the route when you are not wearing winter boots and winter clothing—Toyama Prefectural Police's Autumn Mountain Advisory explicitly instructs hikers without winter boots and clothing to turn back without fail if snow appears on the route.
Pair your traction devices with warm gloves (plus spares), insulating layers (Layering Guide), a headlamp, and an emergency bivy shelter (zelt).
References
- Japan Meteorological Agency — Forecast Terminology: Temperature and Humidity
- Japan Meteorological Agency — Climate Normals (1991–2020): Nagano
- Japan Meteorological Agency — Climate Normals (1991–2020): Karuizawa
- Japan Meteorological Agency — Climate Normals (1991–2020): Mt. Fuji
- Nagano Local Meteorological Office — Climate Characteristics of Spring (Frost and Radiative Cooling)
- Nagano Prefectural Police — 2026 Autumn Mountain Advisory (PDF)
- Toyama Prefectural Police — Autumn Mountain Information 2025
- National Police Agency — 2025 Overview of Mountain Accidents in Japan (PDF)
- Montbell — Chain Spike Instruction Manual #1129740 (PDF)
- U.S. National Park Service — Winter Hiking: Grand Canyon National Park