
Photo: Joshua Tree National Park, Wikimedia Commons (Public Domain)
Beginner Day-Hike Packing Checklist for Japan: 9 Essentials for Mt. Takao & Low Mountains
Planning your first day hike on a low mountain near Tokyo such as Mt. Takao, Mt. Mitake, or Mt. Tsukuba? Use this practical packing checklist covering the 9 core essentials, the hydration formula for hiking, and why rainwear, a warm layer, and a headlamp matter even on beginner trails.
Information checked October 24, 2026 against official publications from the Ministry of Health, Labour and Welfare (Myna Health Insurance Card), the Water Resources Environment Center (Hydration Formula for Mountain Walking), Hokkaido Prefecture (Mountain Safety Guidelines), and Montbell.
When preparing for your first day hike on a low mountain near Tokyo—such as Mt. Takao (599 m), Mt. Mitake (929 m), or Mt. Tsukuba (877 m)—it is easy to wonder how much gear you actually need. A full alpine mountaineering kit is unnecessary for a 3- to 4-hour walk on maintained trails, yet heading out empty-handed in cotton sneakers can leave you cold, dehydrated, or stranded after dark if a trail delay occurs.
This guide organizes day-hike gear into 9 core essentials you should carry on every hike, explains why two-piece rainwear, a warm layer, and a headlamp belong in your pack even on sunny days, and provides a simple formula for calculating how much water to bring.
1. The 9 Core Essentials for Every Beginner Day Hike
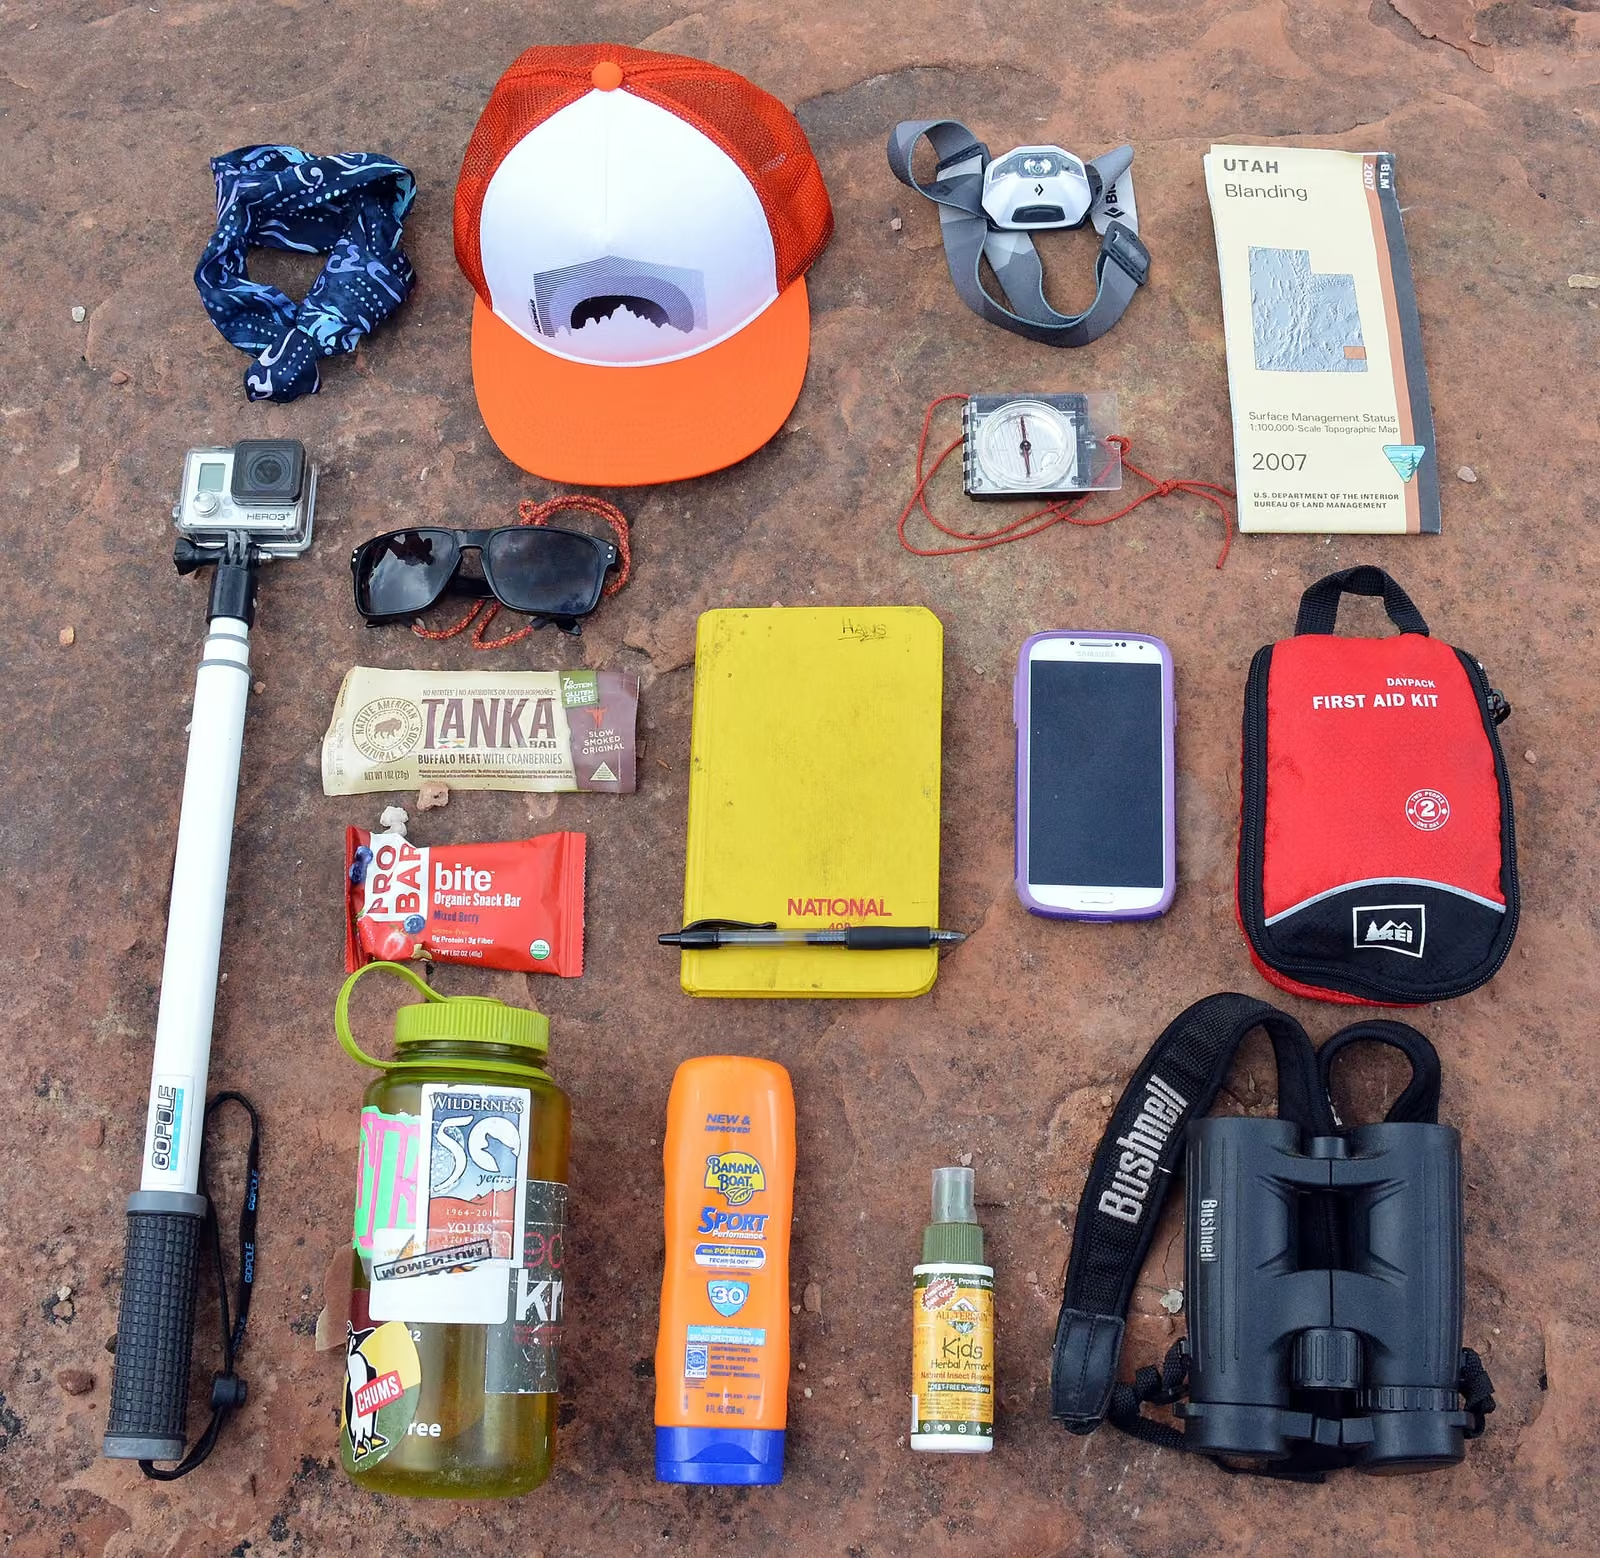
Whether you are walking Trail 1 on Mt. Takao or traversing from Mt. Takao to Mt. Jinba, verify these 9 items before leaving home:
| # | Item | Key Points & Why It Matters |
|---|---|---|
| 1 | Backpack (15L–25L) | Keeps both hands free on stairs, tree roots, and rocky slopes so you can catch yourself if you trip. |
| 2 | Footwear (Trekking Shoes or Grippy Sneakers) | Paved routes (like Mt. Takao Trail 1) can be walked in cushioned athletic shoes, while unpaved dirt/root trails (Trails 6, Inariyama, Mt. Mitake, Mt. Tsukuba) are much safer in mid-cut or low-cut hiking shoes with lugged soles. |
| 3 | Two-Piece Rainwear (Jacket + Pants) | Waterproof-breathable rain jacket and pants—not a plastic poncho or umbrella—double as wind protection. |
| 4 | Warm Layer (Fleece or Light Down Jacket) | Summit temperatures drop ~0.6°C per 100 m of elevation plus ~1°C per 1 m/s of wind, and sweat cools your body rapidly during lunch breaks. |
| 5 | Water & Electrolytes (1.0L–1.5L) | Carry water or sports drink in easy-to-reach bottles; add salt tablets or electrolyte powder in warm weather. |
| 6 | Trail Food (Energy Bars, Onigiri, Nuts, Gels) | Small, ready-to-eat snacks prevent "bonking" (shari-bate, low blood sugar) on the climb and descent. |
| 7 | Smartphone + Power Bank + Offline Map | Cellular reception drops in mountain valleys; pre-download offline trail maps before reaching the station, and carry a power bank plus charging cable. |
| 8 | Headlamp | Essential insurance if a wrong turn, twisted ankle, or cable-car queue delays your descent past sunset. |
| 9 | Cash (100-Yen Coins & 1,000-Yen Bills) + ID / Health Insurance | Mountain toilets (donation boxes of 100 yen), rural buses, and trailhead lockers or vending machines often accept cash only. |
2. Why Rainwear, a Warm Layer, and a Headlamp Are Non-Negotiable
Beginners often ask: "If the weather forecast is 100% sunny and I plan to finish by 2:00 PM, do I really need rainwear, a warm jacket, and a headlamp?" Here is why experienced hikers never leave them behind:
1. Waterproof-Breathable Rainwear (Jacket & Pants Separate)
- Mountain clouds form along ridges even when the city forecast is clear.
- An umbrella leaves one hand occupied and blows inside-out on windy ridges, while a cheap vinyl convenience-store raincoat traps sweat inside until your base layer is soaked from within.
- A waterproof-breathable jacket and pants set (such as GORE-TEX or Montbell Dry-Tec) blocks both rain and cold ridge wind while letting sweat vapor escape (Hokkaido Prefecture Mountain Safety Guidelines, Montbell Layering Guide).
2. A Packable Warm Layer (Fleece or Light Down)
- At a 600 m to 1,000 m summit, air temperature is 3.5°C to 6°C cooler than at sea level—and as soon as you stop walking for 15 minutes at the summit, sweat evaporates and chills your core.
- Packing a lightweight fleece or packable down jacket in your bag lets you put warmth on immediately when you stop for lunch or wait for a bus.
3. A Headlamp (Not Just Your Smartphone Flashlight)

- Under dense cedar canopy in mountain valleys, trails grow dark 30 to 60 minutes before official sunset (as early as 4:00 PM in late autumn and winter).
- Using your smartphone's LED flashlight occupies one hand on steep steps and rapidly drains the battery you need for your GPS map and emergency phone calls. A compact headlamp (100–300 lumens, ~60–90 g) costs very little weight and keeps both hands free.
3. How Much Water & Trail Food to Pack
Hydration Calculation Formula
A widely cited physiological benchmark for mountain walking is the dehydration formula (Water Resources Environment Center — Hydration in Mountain Walking):
$$\text{Estimated Fluid Loss (ml)} = \text{Body Weight (kg)} \times \text{Walking Hours (h)} \times 5$$
- Example: A 60 kg hiker walking for 4 hours loses roughly $60 \times 4 \times 5 = \mathbf{1,200\text{ ml}}$ of fluid.
- Practical Rule for Beginner Day Hikes:
- Spring / Autumn / Winter (3–4 hr hike): 1.0 L to 1.5 L (include a 350–500 ml insulated thermos of hot water or tea in cold months).
- Summer (3–4 hr hike): 1.5 L to 2.0 L (combine water with sports drink or oral rehydration solution to replace sodium).
- Even if vending machines exist on Mt. Takao, always keep at least 500 ml of emergency reserve water untouched until you reach the station.
Trail Food (Kodo-shoku)
Rather than relying solely on one big lunch at the summit, snack every 60 to 90 minutes on foods that require no cooking:
- Rice balls (onigiri), bread, or Baumkuchen (carbohydrates)
- Trail mix, almonds, chocolate, or羊羹 (yokan, sweet bean jelly)
- Energy gels or amino-acid pouches
- Salt tablets or pickled plums (umeboshi) to prevent muscle cramps
4. Helpful Extras & Japanese Trail Etiquette Items

- Trash Bags (Ziploc / Plastic Bags): Japanese mountains have no trash cans on the trail. Every wrapper, fruit peel, and tissue must be carried home in a sealed bag.
- Tissues & Wet Wipes: Useful for wiping hands before eating or when rural trail toilets run out of soap or paper.
- First-Aid Pouch: Bandages, blister plasters (hydrocolloid pads), pain relievers, antiseptic wipes, and elastic tape.
- Sun Hat, Sunglasses & Sunscreen: UV intensity increases by ~10% for every 1,000 meters of elevation.
- Gloves: Light trekking gloves in spring/summer protect hands on chains and tree roots; windproof thermal gloves are essential in autumn and winter.
- Change of Shirt & Socks for the Train Ride Home: Keep a dry shirt and socks in a waterproof bag so you can change at the trailhead or hot spring before boarding the train.
- Health Insurance / ID Note for Residents in Japan: Traditional paper health insurance cards expired at the end of July 2026; bring your Myna Health Insurance Card (Maina Hokensho) or a valid Qualification Confirmation Certificate (Shikaku Kakuninsho) (Ministry of Health, Labour and Welfare Notice), or travel insurance / passport ID if visiting from abroad.
Reference Links
- Water Resources Environment Center — Hydration Formula & Fluid Loss During Mountain Walking
- Hokkaido Prefecture — Preventing Mountain Accidents (Hypothermia & Essential Gear)
- Montbell — Layering System & Clothing Guide for Mountain Climbing
- Ministry of Health, Labour and Welfare — Using Your Myna Health Insurance Card